Grilling Chicken On Cast Iron

Lodge Cast Iron makes some nice products.  They are quality cast iron, made in the USA, and sold at incredibly good prices.  Here is a link http://shop.lodgemfg.com/

I was at Walmart the other day to restock up on Corelle dinnerware (which is also great – they just don’t play nicely with a tile floor – and my numbers were dwindling).  I noticed this Cast Iron Grill pan:

81leZN8NLkL._SL1500_.jpg

I never saw the point in these before, but then again, never used one…  But the price was less than $20, so I figured I’d get one…. well I liked it so much I ended up with two :)

So far I’ve cooked Pork Chops and Chicken Tenderloins.  Here is a picture of the chicken from lunch today.  I must say, some of the best chicken I’ve ever eaten.  Perfectly seared, drizzled in salt, pepper, lemon, and butter, it was cooked completely but soooo tender and juicy.

20180410_143336.jpg

This deserves a longer post, but I’ll put the rundown here for reference:

  • Rinse tenderloins in sink and shake off excess water
  • Liberal amount of kosher salt and pepper
  • Get grill pan(s) screaming hot (starting to smoke) and lay the chicken on it for about 3-4 minutes until the underside has nice grill marks.
  • Turn chicken over, turn burner to LOW, and let other side also get grill marks (another 3 minutes or so).
  • Turn over every 1-2 minutes brushing butter on the freshly turned up side and drizzling fresh lemon juice on each side.  Continue this until internal temp reaches 165+ in the thickest part.
  • Let rest for 5 min in a pile on a plate.

Enjoy!

Southwestern Smoked Chicken And Corn

Another “experiment”…  Thanks again to Ezra, I had some fresh KC BBQ Rubbed Smoked Chicken Breast in the fridge.

Frozen, sweet white corn, in seasoned cast iron on high heat until perfectly done (stirring constantly).  Chopped up smoked chicken breast in.  A little Adobo (which is made from salt, pepper, garlic, spices) for seasoning and a few tablespoons of heavy whipping cream to meld it all together.

Served with On The Border corn chips and fresh salsa.  Mmmm.  It was outstanding.

20180326_232902.jpg

Smoked Chicken And Cheese Wrap

Being in the possession of some freshly smoked chicken breast (Thanks Ezra!), I made a smoked chicken and cheese wrap.   Chunks of smoked chicken and chunks of Boar’s Head Munster cheese into a cast iron skillet until sizzling.  Flour tortilla into another skillet with a dollop of butter until browned on both sides.  A little bit of mustard and mayonnaise wrapped up with the sizzling chicken and cheese mix…. it was divine.

20180319_232019.jpg


Beef and Broccoli v2

This is our second go at beef and broccoli (with peppers, sugar snap peas, and carrots).

For the first try see: https://blog.gahooa.com/2018/03/12/beef-and-broccoli-recipe/

  • Beef was cut a bit smaller.
  • Soaked 4 cups water + 1/4 cup baking soda + 1 tbsp salt for 13 minutes.
  • Veggies were boiled slightly less – they were not quite done when we drained them.  This way when mixed and heated again with the meat and sauce they ended up about perfect.

Also first try at fried rice.  I thought for sure I ruined it but it turned out okay.  Looking forward to doing this again.

20180315_192328.jpg

20180315_192349.jpg

Beef and Broccoli (Recipe)

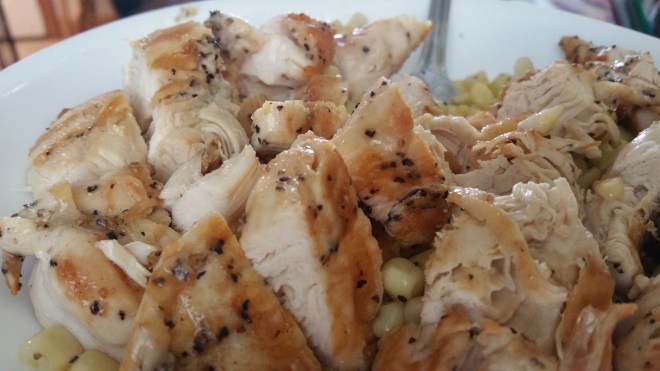
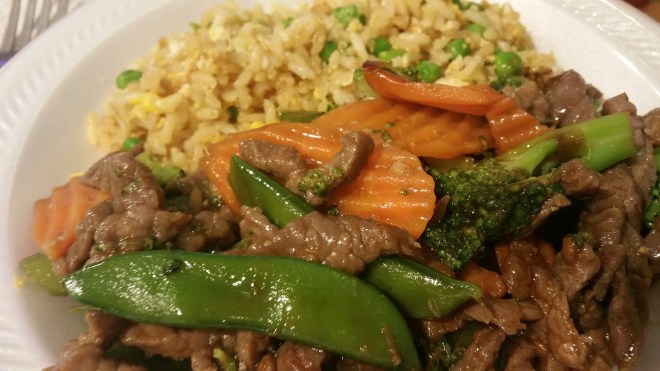
This is my first go at Beef and Broccoli.  While it’s not quite as “pretty” as the chicken dishes, it’s flavor and texture was outstanding.

I like doing this at home, from scratch, because it is a challenge, and lets me cook quite healthy food that tastes amazing.

Ingredients:

  • Stir fry beef (1+ lb)
  • 2 big broccoli crowns (2+ lbs)
  • half a bag of sliced carrots (about 1/2 lb)
  • a large green pepper
  • kikkoman hoisin sauce (half jar – about 5 oz)
  • sesame oil (about 1-2 tsp)
  • peanut oil (about 4 tbsp)
  • fresh garlic (5-10 cloves, less than one head)
  • ground ginger (about 1 tsp)
  • kikkoman reduced sodium soy sauce (a couple tbsp)
  • baking soda (1/4 cup or 4tbsp)

Prepare Rice

Put 1-2 cups of rice in your largest pot full of boiling water.  Keep on high.  After 13 minutes, dump in strainer and rinse with warm water to stop it from cooking.  Remove to bowl and wash your strainer :)

Prepare Meat

Trim meat down into consistently sized pieces.  Most of what I had was about 1/2″ wide by 1/4″ to 3/8″ thick.

Place in large bowl along with 4 cups warm water and 4 tbsp baking soda.  Agitate every couple of minutes to keep the baking soda from settling out.  After 10-12 minutes, place in strainer and rinse with cool/warm water, then after done dripping, move to a bowl and wash your strainer :)

Note: do not leave it in solution too long or it will start to gain a weird texture that is not appetizing.  If left in just the right amount of time it will have a soft texture like from a restaurant.

Once in the bowl, crush 5-10 cloves of garlic on the meat.  Sprinkle a generous amount of ginger on it as well (1 tsp).  Put 5-10 shakes of sesame oil on it as well (1 tsp).

Prepare Veggies

While meat is soaking, chop up pepper, carrots, brocolli into bite sized pieces.  Place in large bowl.

Get a large pot full of boiling water and dump the vegetables in.  Keep on high heat.  It only takes 3-5 minutes, you’ll know they are done by sampling them to see when they are soft but still crispy. Without delay, dump into strainer to stop them from cooking in the hot water.  Remove to bowl and wash your strainer :)

Cook Meat:

In your largest skillet, hopefully cast iron, and on super high heat (I use 2 burners with a 17″ skillet), get the skillet smoking hot.  Then add about 4 tbsp of peanut oil.  Promptly dump in the meat and then start and keep moving it around.  You want the skillet to stay hot hot hot.  When you think it is about done, snip a thick piece in half to see if it is cooked through.  Try not to over cook as this only takes about 3-5 minutes.

Once done keep heat on medium high and:

Assemble It:

Dump in veggies.  All of the veggies.  Dump in half a jar of hoisin sauce (about 4-5 oz).  Add a generous amount (1-2 tbsp) of soy sauce.  All this time you should be stirring so as to sizzle the veggies, but not too long, maybe 45 seconds or so.

Turn off heat.  Make sure it is all stirred together and if needed add a little more soy sauce, ginger, sesame oil, salt, or hoisin sauce – all to taste.

Enjoy:

Compared to many restaurant versions that are heavy on the sauce, this is a “light dish”,. It only has about 5 tbsp of oil covering 10 generous servings.  And the fact that 1 lb of meat is spread across 10 servings means it is mostly veggies.

We put down about 1/2 rice and cover it with about 1/2 beef and broccoli.

20180312_130240.jpg

Note: this is a “draft recipe” from memory based on my first experience with cooking this dish.  But it did turn out well I thought I’d write it down.  I did not base this on another recipe, but rather from some techniques I’ve been practicing.


Python Word Find Program

Ezra and I took 30 minutes this evening and wrote a word find puzzle solver in Python.  This uses a little bit of pre-processing, sets, dictionaries, tuples, and other (less efficient) techniques to fairly quickly find the answers.


board = '''
m a i n v f
a n a f d d
s m i t h a
i r o n r v
e m o z a i
a e e t a d
'''
words = '''
ezra
david
sam
smith
iron
fire
'''
# use this to get a dictionary involved.
#words = open('dictionary.txt', 'rt').read()
BOARD = {}
x = 0
y = 0
for line in board.strip().split('\n'):
y += 1
x = 0
for char in line:
char = char.lower()
if char in 'abcdefghijklmnopqrstuvwxyz':
x += 1
BOARD[x,y] = char
WORDS = set()
for line in words.strip().split('\n'):
word = line.strip().lower()
if len(word) >= 3:
WORDS.add(word)
DIREC = (
(0,-1),
(1,-1),
(1,0),
(1,1),
(0,1),
(-1,1),
(-1,0),
(-1,-1),
)
PREFX = set()
FOUND = set()
for word in WORDS:
prefix = ''
for c in word[:-1]:
prefix += c
PREFX.add(prefix)
# For each position on the board
for x,y in BOARD:
# For each direction of 8
for xx,yy in DIREC:
x1 = x #cur pos
y1 = y #cur pos
word = '' #cur word
while True:
# Check if off board
if (x1,y1) not in BOARD:
break
# Get character at current pos
word += BOARD[x1,y1]
# If it is a word, add it
if word in WORDS:
FOUND.add(word)
# If this is not a prefix, then bail out
if word not in PREFX:
break
# Increment current position based on direction
x1 += xx
y1 += yy
print(FOUND)

view raw

wordfind.py

hosted with ❤ by GitHub

Installing VisPy on Windows 10

VisPy is a Python library for interactive scientific visualization that is designed to be fast, scalable, and easy to use.

Here is how I installed it:

First I installed the latest Python 3.6 on Windows 10 by following the directions on http://www.python.org.  Once this was installed, I opened up Windows PowerShell and ran this command:

py -m pip upgrade vispy PyQt5 --user

I found some sample code here, and using NotePad++, copied and pasted it, saving it to Desktop\Code\v1.py

https://github.com/vispy/vispy/blob/master/examples/basics/gloo/animate_shape.py

In PowerShell, I changed to the directory that I saved the python code to and ran it:

cd Desktop\Code
py .\v1.py

Here is the output:

zzzz

It’s a pretty smooth and clean looking UI.  It seems extremely powerful, but I’ll need to dig in and see what makes it tick…

2D Sine Wave Example Using PyOpenGL

Here is an example of a moving 2D sine wave using Python 3, PyGame, and PyOpenGL.  See a https://blog.gahooa.com/2018/02/11/pygame-and-opengl-on-windows-10/  for how to install them.

sine

This sample program is designed to have a 100×60 unit working area with a 10 unit buffer around the edges.  You can see the axis in the lower-left (0,0) where Y+ is up, and X+ is to the right.

The structure of the program was created to make it super easy to work on the “guts” of the graphics without getting it confused with the “bookkeeping” end of OpenGL or PyGame.

Note: the glOrtho() command is how 2D “parallel perspective” is setup.  It defines the left, right, bottom, top, near plane, and far plane.  Because it is parallel, there is not the notion of a “camera” per-se, but rather section of the plane that should be viewed.  Documented here:

https://www.khronos.org/registry/OpenGL-Refpages/gl2.1/xhtml/glOrtho.xml

Here is the code!


#!/usr/bin/env python
###############################################################################
# Action Happens Here 50 times per second
def tick(i):
#glRotatef(1, 0, 0, 1)
#glTranslatef(0, 0, 1)
# Draw Axis
axis(i)
# Draw sinewave
for x in range(200):
x = x/2.0
y = math.sin(math.radians(x+i) * 10) * 30 + 30
cquad((x,y,0), 1, (y/60.0,0,x/100.0)) #(center, diameter, color)
###############################################################################
# The rest of this is the bones that make it work
import time
import pygame
from pygame.locals import *
from OpenGL.GL import *
from OpenGL.GLU import *
from OpenGL.arrays import vbo
import math
FPS_TARGET = 50
def axis(i):
glBegin(GL_LINES)
#x = red
#y = green
#z = blue
glColor3f(1, 0, 0)
glVertex3fv((0, 0, 0))
glVertex3fv((1, 0, 0))
glColor3f(0, 1, 0)
glVertex3fv((0, 0, 0))
glVertex3fv((0, 1, 0))
glColor3f(0, 0, 1)
glVertex3fv((0, 0, 0))
glVertex3fv((0, 0, 1))
glEnd()
def quad(points, color):
glBegin(GL_QUADS)
glColor3f(*color)
for p in points:
glVertex3fv(p)
glEnd()
def cquad(point, size, color):
glBegin(GL_QUADS)
glColor3f(*color)
x,y,z = point
s = size/2.0
glVertex3fv((x-s,y-s,z))
glVertex3fv((x+s,y-s,z))
glVertex3fv((x+s,y+s,z))
glVertex3fv((x-s,y+s,z))
glEnd()
def main():
#initialize pygame and setup an opengl display
pygame.init()
pygame.display.set_mode((1200,800), OPENGL|DOUBLEBUF)
glEnable(GL_DEPTH_TEST) #use our zbuffer
glEnable(GL_BLEND);
glBlendFunc(GL_SRC_ALPHA, GL_ONE_MINUS_SRC_ALPHA);
#setup the camera
glMatrixMode(GL_PROJECTION)
#gluPerspective(45.0,1000/1000,0.1,1000.0) #setup lens
#glOrtho(-10,10,-10,10,1,20)
glOrtho(-10,110,-10,70,-1,1)
#glTranslatef(0, 0, -100) #move back
#glRotatef(-20, 1, 0, 0) #orbit higher
nt = int(time.time() * 1000)
for i in range(2**63):
nt += 1000//FPS_TARGET
#check for quit'n events
event = pygame.event.poll()
if event.type == QUIT or (event.type == KEYDOWN and event.key == K_ESCAPE):
break
glClear(GL_COLOR_BUFFER_BIT|GL_DEPTH_BUFFER_BIT)
tick(i)
pygame.display.flip()
ct = int(time.time() * 1000)
pygame.time.wait(max(1,nt – ct))
if i % FPS_TARGET == 0:
print(nt-ct)
if __name__ == '__main__': main()

view raw

sinewave.py

hosted with ❤ by GitHub

PyGame and OpenGL on Windows 10

First I went to http://www.python.org and downloaded the latest version of Python for windows.  I made sure to select the option to add it to the system path.

Then I opened windows PowerShell (just a nicer term)

py -m pip install pygame --user
py -m pip install numpy --user
py -m pip install pyopengl --user

(I also installed NoteTab++, a nice text editor)

From there, I went to github and copied one of the examples from https://github.com/pygame/pygame/blob/master/examples/glcube.py and saved it on my desktop as myglcube.py.

In PowerShell, you just type:

cd Desktop
py -m myglcube

Here is my example:

zzz

(here is the code)


#!/usr/bin/env python
"""Draw a cube on the screen. every frame we orbit
the camera around by a small amount and it appears
the object is spinning. note i've setup some simple
data structures here to represent a multicolored cube,
we then go through a semi-unopimized loop to draw
the cube points onto the screen. opengl does all the
hard work for us. :]
"""
import time
import pygame
from pygame.locals import *
try:
from OpenGL.GL import *
from OpenGL.GLU import *
except ImportError:
print ('The GLCUBE example requires PyOpenGL')
raise SystemExit
#some simple data for a colored cube
#here we have the 3D point position and color
#for each corner. then we have a list of indices
#that describe each face, and a list of indieces
#that describes each edge
CUBE_POINTS = (
(0.5, -0.5, -0.5), (0.5, 0.5, -0.5),
(-0.5, 0.5, -0.5), (-0.5, -0.5, -0.5),
(0.5, -0.5, 0.5), (0.5, 0.5, 0.5),
(-0.5, -0.5, 0.5), (-0.5, 0.5, 0.5)
)
#colors are 0-1 floating values
CUBE_COLORS = (
(1, 0, 0), (1, 1, 0), (0, 1, 0), (0, 0, 0),
(1, 0, 1), (1, 1, 1), (0, 0, 1), (0, 1, 1)
)
CUBE_QUAD_VERTS = (
(0, 1, 2, 3), (3, 2, 7, 6), (6, 7, 5, 4),
(4, 5, 1, 0), (1, 5, 7, 2), (4, 0, 3, 6)
)
CUBE_EDGES = (
(0,1), (0,3), (0,4), (2,1), (2,3), (2,7),
(6,3), (6,4), (6,7), (5,1), (5,4), (5,7),
)
def drawcube():
"draw the cube"
allpoints = list(zip(CUBE_POINTS, CUBE_COLORS))
glBegin(GL_QUADS)
for face in CUBE_QUAD_VERTS:
for vert in face:
pos, color = allpoints[vert]
glColor3fv(color)
glVertex3fv(pos)
glEnd()
glColor3f(1.0, 1.0, 1.0)
glBegin(GL_LINES)
"""
for line in CUBE_EDGES:
for vert in line:
pos, color = allpoints[vert]
glVertex3fv(pos)
"""
for x in range(-50,50):
glColor3f(x*.03%1.0, x*.04%1.0, x*.05%1.0)
glVertex3fv((x, 0, -100))
glVertex3fv((x, 0, 100))
glVertex3fv((-100, 0, x))
glVertex3fv((100, 0, x))
glEnd()
def main():
"run the demo"
#initialize pygame and setup an opengl display
pygame.init()
pygame.display.set_mode((1024,768), OPENGL|DOUBLEBUF)
glEnable(GL_DEPTH_TEST) #use our zbuffer
#setup the camera
glMatrixMode(GL_PROJECTION)
gluPerspective(45.0,1024/768.0,0.1,100.0) #setup lens
glTranslatef(0.0, 0.0, -20.0) #move back
glRotatef(60, 1, 0, 0) #orbit higher
nt = int(time.time() * 1000)
for i in range(2**63):
nt += 20
glTranslatef(0.0, 0.0, -.1)
#check for quit'n events
event = pygame.event.poll()
if event.type == QUIT or (event.type == KEYDOWN and event.key == K_ESCAPE):
break
#clear screen and move camera
glClear(GL_COLOR_BUFFER_BIT|GL_DEPTH_BUFFER_BIT)
#orbit camera around by 1 degree
glRotatef(1, 0, 1, 0)
drawcube()
pygame.display.flip()
ct = int(time.time() * 1000)
pygame.time.wait(max(1,nt – ct))
if i % 50 == 0:
print(nt-ct)
if __name__ == '__main__': main()

view raw

myglcube.py

hosted with ❤ by GitHub