Designing a better Lime Squeezer

From time to time we host a get-together or party where we feature fresh squeezed limeade as the main beverage.  We have universally heard 5-star feedback from people who have had this simple but good drink.

The problem is, squeezing enough limes for a party of 60+ people takes a lot of time (and limes).  After about the fifth lime the first time… I had enough!

I went down to the shop and built a simple but powerful hinged wooden squeezer about 3′ long.  It looked like two canoe oars with a hinge holding them together.  With this contraption, a suitable helper (Eli), and a big stainless steel bowl, we could really crank out the lime juice (gallons).

Since using that a number of times, I’ve thought of some improvements I’d like to make, eventually ending in a fabricated stainless steel mechanism that is easy to use, powerful, and helpful.  The force applied to the lime should be compounded at the end of the squeeze cycle, taking full advantage of maximum leverage to get the last drops out (less waste, less fatigue).

Using the power of four-bars, I’m working up a Solid Works model which should meet most of the above criteria.  I think we will soon build a prototype out of maple, which is a very hard wood.

Here is a picture of it “open”:

Here is a picture of it “Closed”:


Making a punch; heat treating tool steel

About Tempering Metal  (how I explain it to kids):

The little metal guys normally stand at attention in rows — millions of them (molecules).  When you heat them up red hot, they start dancing and get all mixed up and out of order; not in rows any more.  When you cool them down, they get back into nice neat rows.

However, when you cool them off really fast by dipping in cold water, they get frozen before they can get back into nice neat rows!

If the metal guys are in nice neat rows, and you push on a row really hard, they can all move sideways.  But if they are all mixed up, it’s hard for them to move any way.  

This makes the metal really hard.


As part of Ezra’s box project, he needed to countersink the nails into the plywood.  I should have one, but I don’t have a countersink handy that would do the trick.

So we made one!

1/4″ diameter W1 tool steel rod (water hardened) was cut down to about 3.5 inches long.  Being that I don’t have a metal lathe, I improvised by chucking the metal into my drill and grinding it on the grinder – while spinning.  This resulted in a fairly uniform (albiet scratched) conical point.   We wire brushed it a bit on the grinder to smooth it out, and then took it over to the other side of the shop for heat treatment.

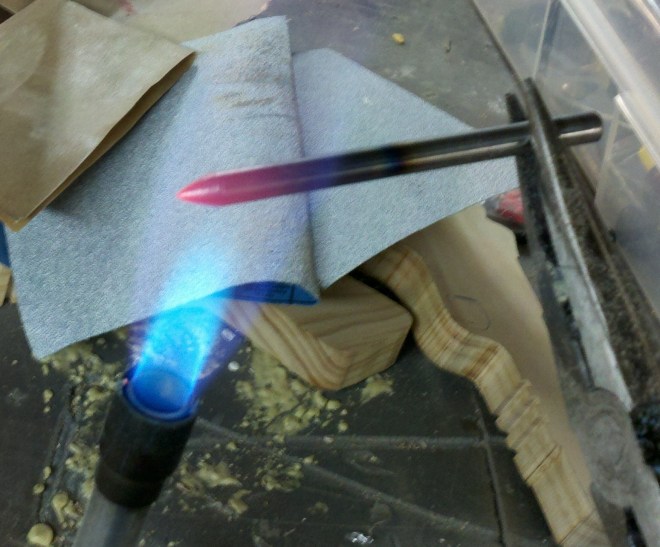
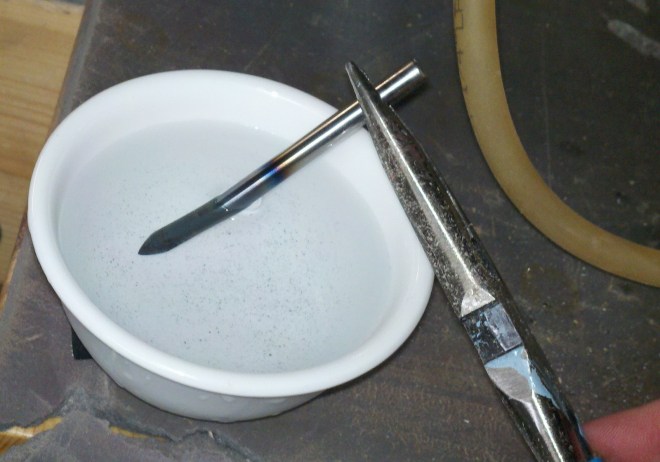
This casual approach to tempering worked well for our purposes.  We heated the metal red hot (just the end) and dunked it in cold water.  Then we polished it up a little bit.

In informal tests, this made it REALLY hard.  If I placed a nail against the top end and banged it, it would scratch the punch.  If I placed a nail agains the bottom (hard) end and banged it, it would flatten the nail without even marking the surface of the punch.

Also, the punch would reliably put small holes in a cast-iron vice and other metal without any noticeable deformation.  Nice!

Here is the pictures:

(Fire extinguisher was about 2 feet to the left, in case you were wondering!)


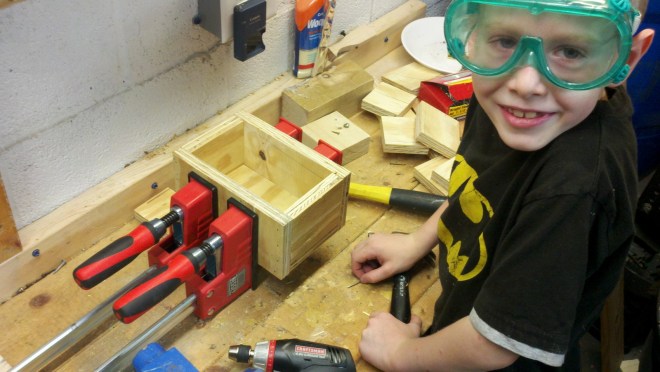
(Ezra) making a wooden box

Ezra brought me a piece of plywood today with pencil marks drawn all over it.  That is where he wanted it cut.  So I ripped it on the table saw and cross cut it on the compound mitre saw…

I gave him a little help laying this out, showed him how to clamp it, and then he went to town drilling 1/16″ holes and pounding finishing nails into it.

Only 2 breaks in the drill-bit, which isn’t bad for such a small bit and a 7 year old.

It turned out nice!  We’ll put a lid and hinges on it soon.


Black and White vs. Color (A buck in the woods)

I was driving up our raised driveway and Ezra exclaimed “There is a DEER!”.  We’ve been seeing quite a few deer (both buck and doe) around the creek recently.

Take a close look at the first photo and see if you can spot him?

Then take a look at the exact same photo in color.  Amazing.

git checkout -b –no-track

Ever want to checkout a new git branch from another branch without setting up tracking?

Here is the longhand way:

git checkout old-branch
git branch new-branch
git checkout new-branch

But there is a quicker way:

git checkout -b new-branch old-branch

… which does the same thing, albiet in one command.