Shave a bit here and there.

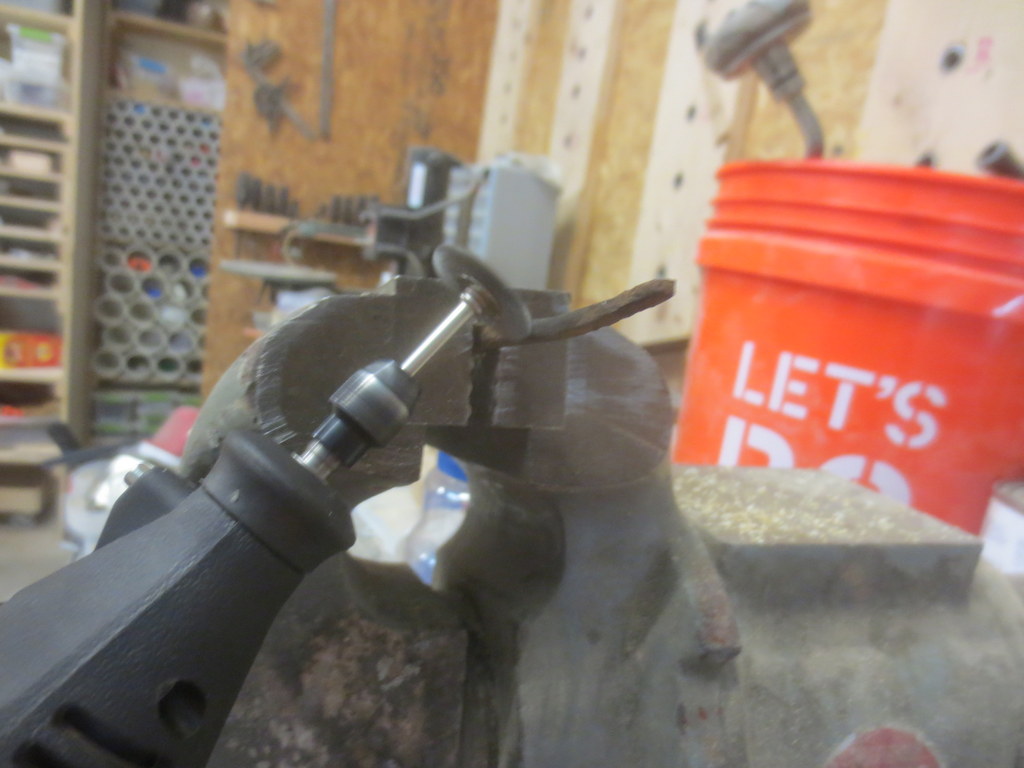
A friend of mine needed a bushing assembly for his street bike to be reduced in width by about 0.230″.  Having a 1930’s South Bend Lathe in my shop, I naturally said “come on over”.

My respect for machinists just went up a few notches (it was already high).  I’m also glad I got a 4 jaw chuck for the lathe instead of a 3 jaw.

4-jaw chucks allow you to hold irregular work and precisely center it. The process for doing so can be tedious, but it’s a good feeling when your indicator reads in at less than 0.001″ variance from side to side.

This little project was fun for a few reasons.  The assembly comes apart into several pieces.  The little ring has multiple inner diameters used for different things, so it needed to be machined carefully on both sides.  Holding small and irregular parts is a challenge.  But seeing it all come together was great.

20170712_224616.jpg

20170712_213227.jpg

Brazilian Cherry Butcher Block Cutting Board

Here are a couple of pictures of a recent Sinking Valley Woodworks project: a Brazilian Cherry Butcher Block Cutting Board.

It’s solid end-grain, glued up with Titebond Ultimate, and sanded down to 2000 grit.  It simply has mineral oil – the gloss is from the wood itself.

What do you think?

Here is the finished product.

Closeup of Brazilian Cherry Butcher Block Cutting Board

Notice how glossy the top is?  That’s what happens when you take Brazilian Cherry end grain to 2000 sanding.

Side View of Brazilian Cherry Butcher Block Cutting Board

The swirls in the grain pattern were intentional.  As the pieces were glued up, the grain was alternated creating a very neat final pattern.

Top View of Brazilian Cherry Butcher Block Cutting Board

Here is a closeup of the grain.

Closeup of Brazilian Cherry Butcher Block Cutting Board Grain

This is prior to any mineral oil being applied.  Notice the reflection of the light that is 9′ above the surface.

Pre Finished Brazilian Cherry Butcher Block Cutting Board

I-Beam clamps.  They are great.

Glue up of Brazilian Cherry Butcher Block Cutting Board

Old hand forged nails

We have some old hand forged nails. The nails were made by a blacksmith.

IMG_7174

We polished them with a Dremel tool using a wire brush.  Did you know that a Dremel tool can spin 500 times per second?  Wow.  We wore safety glasses to protect our eyes.

IMG_7172

Here is a polished nail.

IMG_7177


Here are some facts on old nails.

  • Old nails were once so valuable that when a building burnt or fell down people went through with magnets to find the nails and save them.
  • Nails provide one of the best clues to help determine the age of historic buildings, especially those constructed during the nineteenth century.
  • Between the 1790s and the early 1800s, various machines were invented in the United States for making nails from bars of iron.


Here is the a chart for nails. (Copyright Thomas Visser)

nails


You can read more about it here: http://www.uvm.edu/histpres/203/nails.html

That is all for now!


References:


Cleaning our South Bend Model A Lathe

Cleaning our South Bend Model A Lathe

Our South Bend Model A Lathe was rather stiff when we started working with it but we have been cleaning it up a lot since then.  Now it is running very smoothly by hand – we still do not have it under power yet.

IMG_6739

WD-40 has been a great cleaning agent.  It cuts through old dried up oil really well.   There was a slight bit of rust on the ways, so we used some steel wool and very fine-grit  sandpaper (400 grit) to clean them up.

IMG_6741

Basically it boils down to a lot of time and “elbow grease”.  Thanks to Ezra, it is looking a lot nicer now.

IMG_6740

That is all for now!


A new chuck for the South Bend Model A Lathe

After we got the South Bend Model A lathe setup and started cleaning it up, we discovered that we needed quite a few different parts to make it complete.   One of these is a chuck.

I’ve heard it said that if you can only have a single chuck, make it a 4-jaw chuck.  So that is what we started with.

This is a Shars 6″ 4-jaw independent chuck from http://www.shars.com/product_categories/view/4111108/4Jaw_Independent_Chucks

IMG_6682


It came with a 1.5 x 8 threaded mounting plate.

IMG_6678

However, when we went to bolt them together, we discovered that the chuck didn’t fit the mounting plate!  How could that be?

A quick phone call to Shars cleared that up.  Apparently (this is common knowledge to machinists, but) we need to turn down the mounting plate to an exact fit.  This ensures that the chuck will run true on our lathe.

IMG_6684

But before we can do that, we need to wire up a motor, and get some tooling, and a tool post, etc…

That’s all for now!