Plain to Pretty: Rubber Band Gun #6 Anodized

Gord over at Gord’s Garage has been busy with home-based anodizing.  It’s some amazing stuff he is doing. I sent him one of the rubber band gun assemblies, and he did an amazing job on it.

In an incredible amount of detail, Gord has written up and photographed the whole process:

http://gordsgarage.wordpress.com/2011/11/21/the-full-monty-part-1/

http://gordsgarage.wordpress.com/2011/11/22/the-full-monty-part-2/

In summary, it went from this mill finish:

To this polished finish:

To this anodized finish:

Amazing!


Detailed Assembly of Rubber Band Gun M6-002 to M6-005

A few photographs of our assembly of M6-002 to M6-005…

It all started by laying out all of the pieces for each assembly.  Quite a few when you add them all up.  Pictured below are the parts for 4 assemblies.  Receiver, Pins, Actuator, Hammer, Trigger, Washers, Springs, Bolts, and Nuts, along with some tape to hold the loose pins in (temporarily).

Refer to https://blog.gahooa.com/2010/09/23/rubber-band-gun-6-four-pieces-explained/ for more information on each piece.

Here is the receiver.  Note, the two small holes beside each other.  This is to allow for an adjustment to spring tension if needed.

These springs are tough little guys.  ~ 9 pounds per inch, with a max travel of just over 1/2 ” (if I recall correctly).  They also cost $1.29 each in quantities of 100+.

In order to use them, I needed to snip the closed loop open on one end.

Following this, the springs were hooked onto the actuators.

Using dowel pins, we placed the actuators and springs into the receiver…

… separated by red, hard fiber washers.  These washers have a very tight thickness tolerance, which is needed in this application.

Once the actuator was in place and the springs fully connected, we inserted the hammers.

The hammers had more room for spring stretch, so we opted for a cheaper, longer stretch spring (about $0.50 each in small qty).

The most interesting, and hardest to machine piece in the assembly is the trigger.  Due to an error in machining, the trigger hole was drilled to just 0.250 inches, instead of the 0.1875 the drawing called for.  I purchased a 0.2503″ reamer (accurate to +/- 0.0001″ (yes, a ten thousandth of an inch).  This made the trigger fit perfectly on the dowel pins (but only after blowing the dust out!).

Another view of the trigger.  Notice the step in the aluminum… This is what causes one hammer to release before the other.

I chose stainless steel screws to hold the mechanism into the wooden stock, although other methods could be employed.  Plus, I just like close up photographs, so I included this one.

Here are the four assemblies finished.  The tape is placed over any loose pins to keep them from falling out.  The wooden stock will retain them firmly, similar to the design of a Ruger 10/22.

A close up shot of the receiver.

And the excellent helpers…

Now we just need to make several more stocks!


A new stock for rubber band gun #6

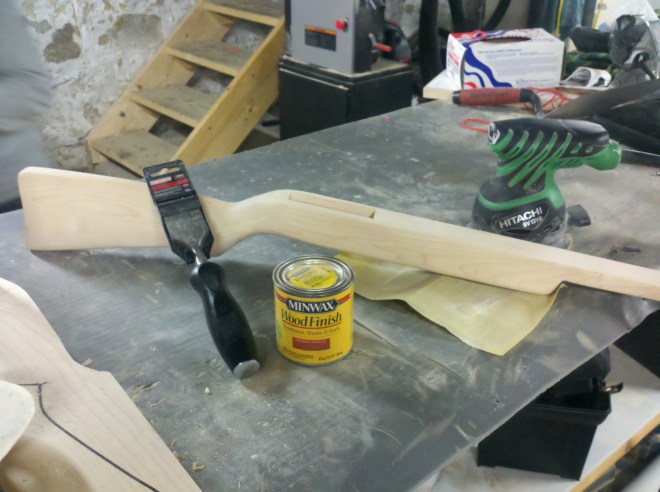
In anticipation of receiving the assembly for Rubber Band Gun #6 from Dixon Tool and Die, Inc., we have been making a new rubber band gun stock to complete the package.

This stock was hand crafted out of solid 1.75″ x 6.0″ x 48″ slab of maple.  The primary tools were bandsaw (for the profile), hammer and chisel, random orbit sander, end mill, jointer, sand paper, and lots of elbow grease.

There is a technique that we implemented called “raising the grain”.  It involves rubbing the wood with a wet rag, and then letting it dry.  Loose pieces of grain swell up and in turn raise up out of the wood, where they can be sanded off.

At the bottom-left corner of this photo, you can see another blank ready to be cut.

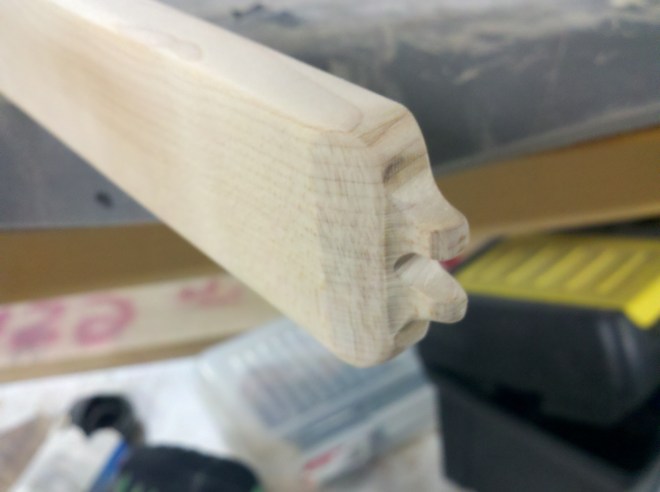
A lot of thought and testing went into this simple design and it works really well.  The catch (no pun intended) is to allow the rubber bands to release cleanly with no interference.

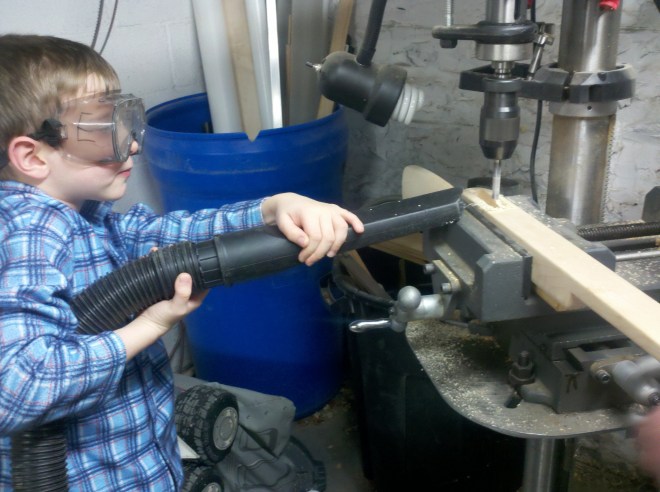
Here is Mr. E holding the shop-vac to keep the end mill from clogging up.  My Sherline milling machine is not large enough to hold this stock conveniently, so we used a drill press and cross-slide vice to mill it out.  Drill presses are not as rigid as milling machines, so we had to take it slow.

Rubber Band Gun #6 – four pieces explained

I spent a bit of time this evening taking measurements and verifications, adding pin holes, and communicating with Dixon Tool and Die about pricing, etc…

Here are the 4 key parts in the design:

Trigger: Pivots on a 3/16″ dowel pin.  As the trigger is pulled, the two protrusions from the front move downward into the actuators.  The one side is milled out 1/16″ deeper than the other, so that the one side of the rubber band gun fires before the other.  A 2 stage trigger.

Hammer: The hammer is not a hammer in the sense that it strikes something, but only in that it resembles the hammer from a gun.  It pivots on a 3/16″ dowel pin.  At the bottom is a milled out section directly below the pivot point, providing for a linear, smooth release.  The notch and hole on the front are used to attach a spring, which provides an automatic-reset for the hammer.

Actuator: Because I couldn’t think of a better name at the time.  This is the piece which holds the hammer from being released, and also contacts the trigger, both providing a linkage to be released, as well as spring tension up on the trigger.  Since the trigger does not have a spring, it relies on the contact from this part to provide springiness.

Receiver: For simplicity, this is milled and drilled from a 1.000 x 1.500 aluminum tube with 0.125″ thick walls.  It is responsible for holding pins, which in turn hold the rest of the parts.

Well, that’s all for now.

Rubber Band Gun #6 – springs, etc…

I visited Dixon Tool and Die, Inc. today to see about having some machining done.  Bill Dixon Jr. was very helpful, and explained many of the points that will make the process go easier.

  1. Design for available parts and sizes
  2. Buy everything you can stock (pins, springs, aluminum channel, etc…)
  3. Minimize milling by doing the above

To that end, I did a bit of springy research, and found that neither McMaster Carr or Manhattan Supply Co. had really small springs in bulk (only precision (eg expensive) springs in those sizes).

So I re-placed one of the pins to fit a standard (cheap) McMaster spring, and got pricing from http://centuryspring.aitrk.com/products/extension.html for a special spring.  The trigger spring has ~ a 2/1 leverage (finger/spring), so we need to have several lbs of spring pull to equal a decent trigger pull.  They have a spring with these dimensions:

Part #80127
Diameter: 3/16″
Rest: 0.63″
Max Travel: 0.39″
Load at max: 3.9lbs
ID of loops at ends: .132
$1.20 each at 100

While $1.20 is more than I wanted to pay, it sure beats $2.00 to $3.00 per spring that I was looking at from McMaster.

With a shorter spring, I was able to re-design the pin placement, which resulted in this:

Rubber Band Gun #6 and Pro/Engineer Wildfire

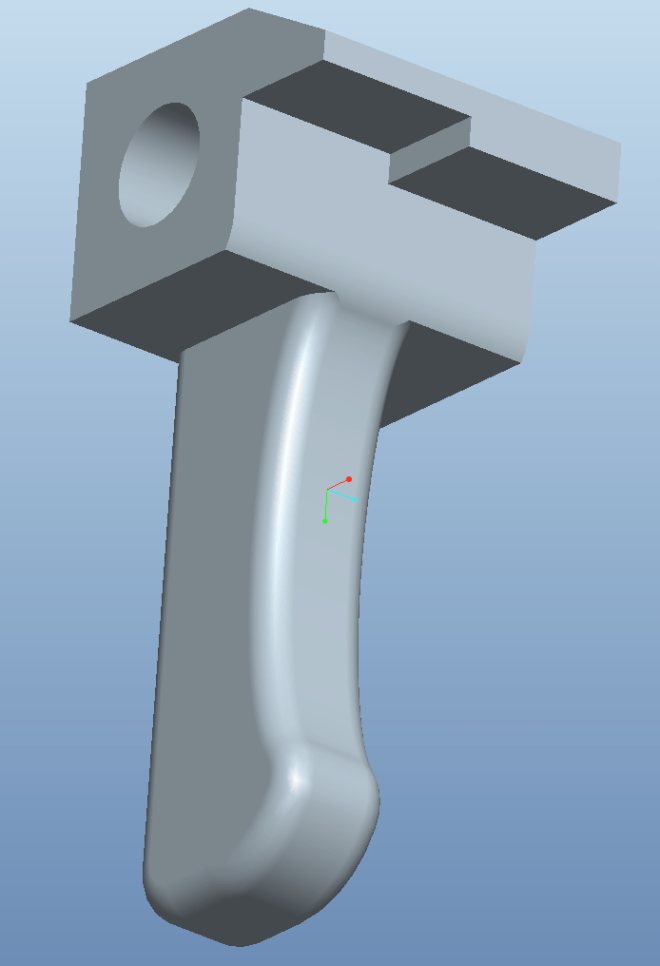
I recently purchased a copy of Pro/Engineer Wildfire 5.0, and have been comparing it to SolidWorks. They are both nice programs, and within about a day, I have achieved about the same level of usefulness in ProE as SolidWorks. (Note: all that means is that I am a beginner at this).

Anyway, I wished to share one of the models I’m working on. This is a mechanism for a Rubber Band Gun receiver.