Our new kittens

We got two new kittens from Patches! (if you did not read the blog “Our Cats” or “Kittens” click on Patches for “Our Cats” and click Kittens for the blog on our Kittens.)

We named one Oreo, and the other is Hiccup. We picked the name Oreo because she is black on the ends and white in the middle like an Oreo. We picked the name Hiccup because he looks a lot like the dragon from the movie How To Train Your Dragon but acts like Hiccup in How To Train Your Dragon.

Oreo’s personality is:

  • always wanting outdoors
  • always attacking her sister
  • running over and scratching my brother’s face at night
  • more of a hunter

Hiccup’s personality is:

  • more of a house cat than an outside cat
  • defending against attacks from Oreo
  • a protector
  • not so much a hunter

Thats all for now!

Kittens!!

We had a litter of five kittens three weeks ago:

Screen Shot 2015-05-04 at 10.53.40 AM

Screen Shot 2015-05-04 at 10.53.31 AM

Screen Shot 2015-05-04 at 10.54.17 AM

Here they are – sleeping or nursing

Screen Shot 2015-05-04 at 10.53.58 AM

We have two “named” so far.  One is named P.J which stands for Patches Junior because she looked a lot like her mom (who is named Patches).  The other is named Dozer because he is huge and pushes the other kittens out of the way to nurse.

Here is Dozer, P.J, and the others sleeping:

Screen Shot 2015-05-04 at 11.04.35 AM

P.J. is on the top left and Dozer is the one closest to the camera (that looks like a tiger).

They all have their eyes open now, but unfortunately they were mostly sleeping when I took this picture:

Screen Shot 2015-05-04 at 11.04.21 AM

What should we name the other three?

How to Calculate Pi

π (pi) is the ratio between a circle’s circumference and it’s diameter. You can check this by using a tape measure. Measure around a circle. Then measure across the circle.

π = Around / Across

Did you know there is a way to calculate π? There are a lot of different ways, but one is called the Leibniz formula for π.

http://en.wikipedia.org/wiki/Leibniz_formula_for_%CF%80

Where the original Leibniz formula for π ends up calculating π/4, I’ve just factored this 4 into the infinite series.

π = 4/1 – 4/3 + 4/5 – 4/7 + 4/9 – 4/11 + 4/13 – 4/15 + 4/17 – … (forever)

The more terms you add/subtract to it, the closer it gets to being accurate. A problem with the Leibniz formula for π is that it takes a lot of calculations to get an accurate version of pi.

Here is a mini-program I wrote in Python 3 to repeat this one million times.

pi = 0
for n in range(1000000):
  pi += ((-1)**n*4) / (2*n+1)
print(pi)

Here are some of the numbers from that calculation:
4.00
2.66
3.46
2.89
3.33
2.97
3.28
3.01
3.25
3.04
3.23
3.05
3.21
3.07
3.20
3.07
3.20
3.08
3.19
3.09
3.18
…999980 more times…
3.1415916535897

Here is real PI:
3.1415926535897

Isn’t it interesting that my version of PI, after a million iterations, is 1 digit off of real Pi, but the digit is in the middle? This has something to do with Euler numbers which you can read about at http://en.wikipedia.org/wiki/Euler_number .

For most practical purposes, 3.14159 is more than enough digits to use with Pi.

Ever wonder if you could use Pie to calculate Pi?
http://www.numberphile.com/videos/pie_with_pies.html

Making a Go board

I like the game Go.  Wikipedia says it was invented about 2,500 years ago in ancient China.  You can read more about it here:

http://en.wikipedia.org/wiki/Go_%28game%29

I was eating M&Ms yesterday and realized they would make great Go pieces.  The added benefit is that if you capture your enemy…  yum…  We got some big bags of the colorful candy and sorted them.  Note this is being done on our dining room “chess” table.

IMG_8034

The plans were drawn up using DraftSight CAD (from the makers of SolidWorks).  It looked like this:

2015-01-09 - B130610

I imported that into VCarve Pro and generated toolpaths.  Here is what some of the gcode looks like:

2015-01-09 - B130704

I started by screwing down a leftover piece of pre-finished oak plywood and double-checking some tool measurements.  Here is a picture of the grid being cut with a 90 degree v bit.

IMG_8024

Subsequent operations included using a 0.50″ ball nosed bit for the edges of the pockets, a 1/2″ straight bit for the center of the pockets, a v bit for the outside chamfer, and a 0.25″ carbide upcut bit for cutting the board out.

IMG_8025

Since I lack a vacuum table, I used both onion skinning (a very thin final layer) and tabs (leftover connections you remove with a chisel) to keep the board from moving during cut out.

IMG_8026

Here is a closeup of the grid.  I need to understand a bit more about feeds and speeds with v-bits because of the very small diameter at the tip of the bit.

IMG_8027

Here is a close up of the orange side during game play.

IMG_8032

And finally a view of all-out-go-combat from above.  I think orange is winning, don’t you?

IMG_8036

Our Cats

We got two kittens in the beginning of summer, but  they are teenager-cats now.

This is Shadow, who is a very good hunter.  She only likes to go to places her sister has already explored.

This is Shadow holding a chipmunk that she caught!

aaa

This is Patches, she is the explorer. When we first got the kittens, Patches explored the house. I guess that after a while Patches must have told Shadow that it was safe because Shadow started going with her everywhere.

This is Patches exploring our brush pile.

IMG_6933

That’s all for now!

Charcoal Grill Project (1)

We recently purchased a very nice gas grill.  It’s really great, but we sometimes still like the flavor of charcoal grilling.   Rather than just buy a charcoal grill, we decided to build one from scratch.

Here is the beginning of the base.  We are going for a dry-stack look, but using mortar to make it very sturdy.

IMG_6618

Mixing mortar in the wheelbarrow.  Not too much water!

Mixing Mortar

Using rubber gloves to lay down the mortar between the stones.  It’s like a big puzzle.

Adding Mortar


Building a little deck for a little house

In this post I will describe some of the work we did while building a 10′ x 10′ deck for the little house on the hill.

Because the house is on a rather steep hill, even getting to the front door was a challenge.  Having a nice deck to sit on goes a long way to making it a wonderful little spot to spend time.

It all started with digging post holes.  Rocky soil, on a hill, with hand tools makes for a lot of work.  Once dug down to 2-3′, we fixed them in place with Fast Set cement.  Poured it in dry and dumped some water on it.  Super convenient.

a

Once the posts were in place, we leveled and screwed on a frame made of 2×10 and 2×8 treated lumber.

b

Keeping the workplace neat.

c

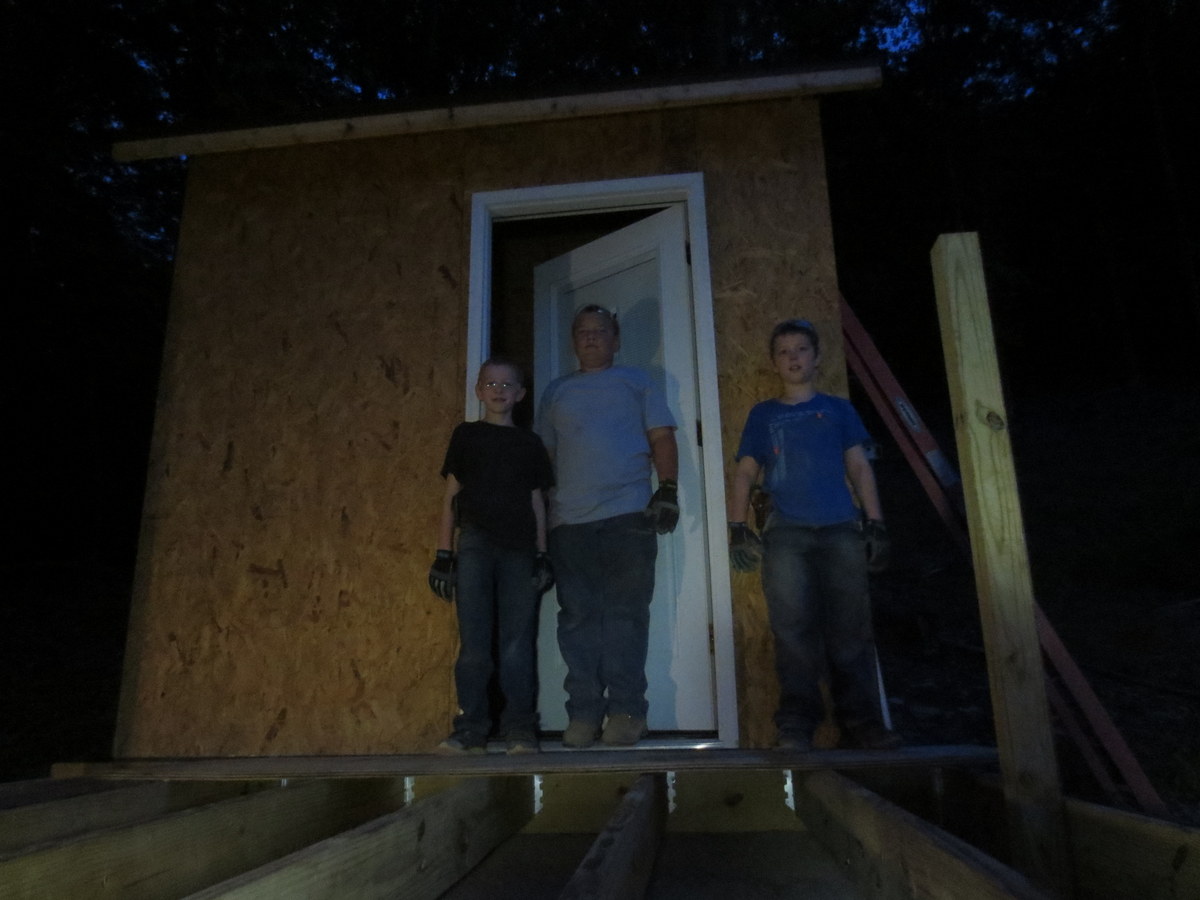
Working into the evening on the framing.  Having 3 surefire flashlights handy makes this possible, even convenient.

d

Because much of the deck load will rest on the front member, and even more so because groups of people tend to converge at a railing, we made this from doubled 2×10 lumber.

e

Here we are installing the decking.  Rather than going with standard decking lumber (5/4″), we opted to go with 2×8 lumber.  It was only a few percent more expensive, and far stiffer.

f

Good workers hard at work.

g

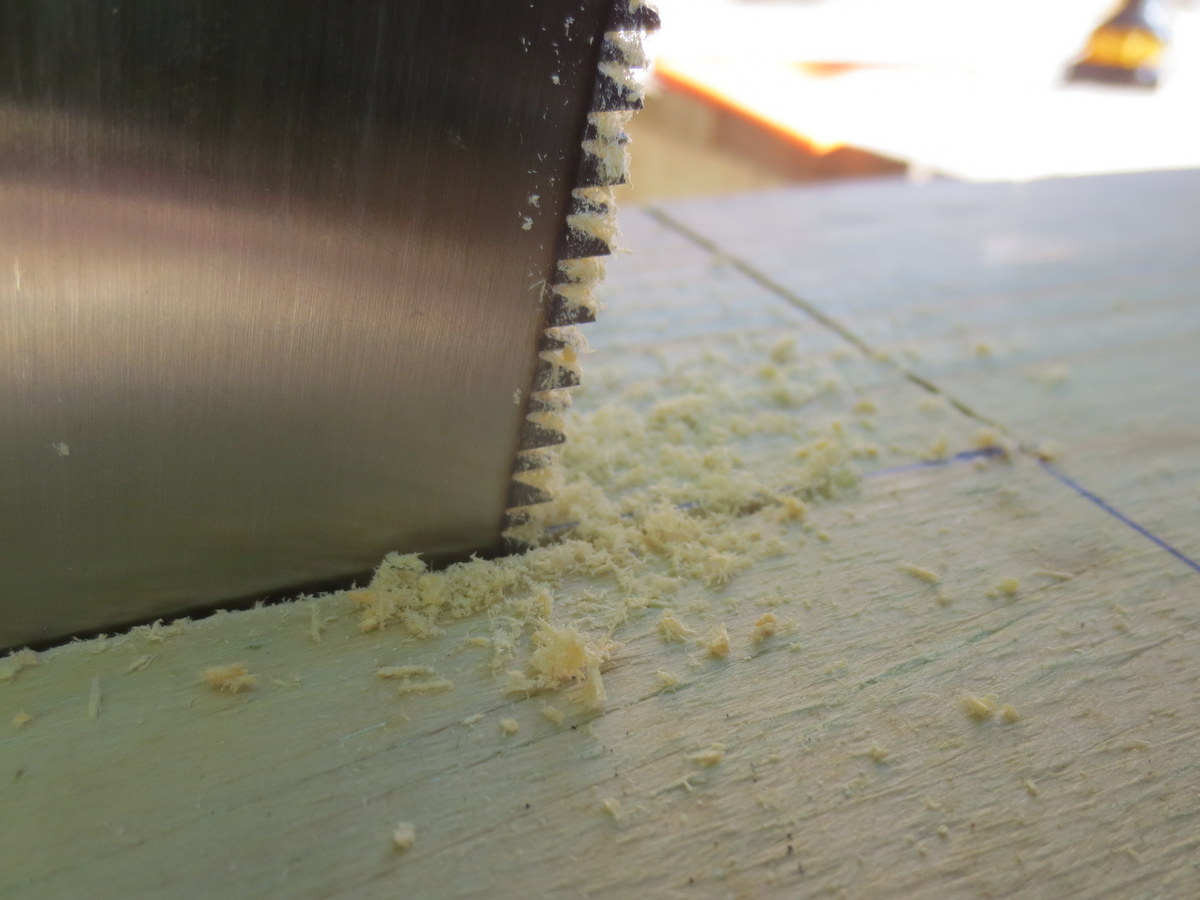
We used a hand-saw to cut notches out of the end of the 2×8 flooring lumber where it (would have) contacted the 4×4 upright posts.  We live in a culture that thinks “power tools” for most things, but sometimes the hand-tools are the best for the job.

h

A close up of the hand-saw approaching the end of the line.

i

Notice that Eli (center) has hearing and eye protection?  This is because he was running the impact driver installing all of the screws in the decking.  There were hundreds and hundreds of screws to install.

j

Here is a view up the hill.

k

A very clear but warm day.

l

We made the railing with 2×6 lumber.  The top part of the railing had a 2×6 on the face of the upright supports as well as a 2×6 cap on top.  This resulted in a very strong (up/down and forward/back) railing that is convenient for setting drinks, etc… on.

m

For this project we elected to use Torx head exterior screws.  Coupled with a Dewalt 20v max impact driver, the 3″ screws made their way through treated lumber like a hot knife through soft butter.

n

Wrapping up.  Just need to finish screwing the decking down and add the top-plate to the railing.

o

The view out the front door.  Nice.

q

Arduino Marble Roller #4 – Video

An update on the MMZ Arduino Marble Roller project.  We got the mechanics in place and a reliable system for transferring the marble to the top of the ramp via servo motor.

Because it is the job of the servo motor to simply move the platform up and down as opposed to accomplishing significant amounts of work, we counter balanced the ramp with a spring to assist the servo in lifting it.

Eli does a great job explaining it in this video:

Making a Wooden Shield

We made a wooden shield out of 3/4″ hardwood plywood.  To get the perimeter, we bent an aluminum bar into the shape of one side, and then used it to trace both sides, making it symmetrical.

We softened a section of 4″ PVC pipe and flattened one side.  After plenty of sanding the endges, we screwed it to the back of the shield with 3/4″ screws.

We cut the handle out of a section of 2×4 on the bandsaw, routed, and sanded it smooth.  Here are the pictures!  All done but a coat of gold or silver paint.

IMG_2211 IMG_2213 IMG_2214