Photography
Brazilian Cherry Butcher Block Cutting Board
Here are a couple of pictures of a recent Sinking Valley Woodworks project: a Brazilian Cherry Butcher Block Cutting Board.
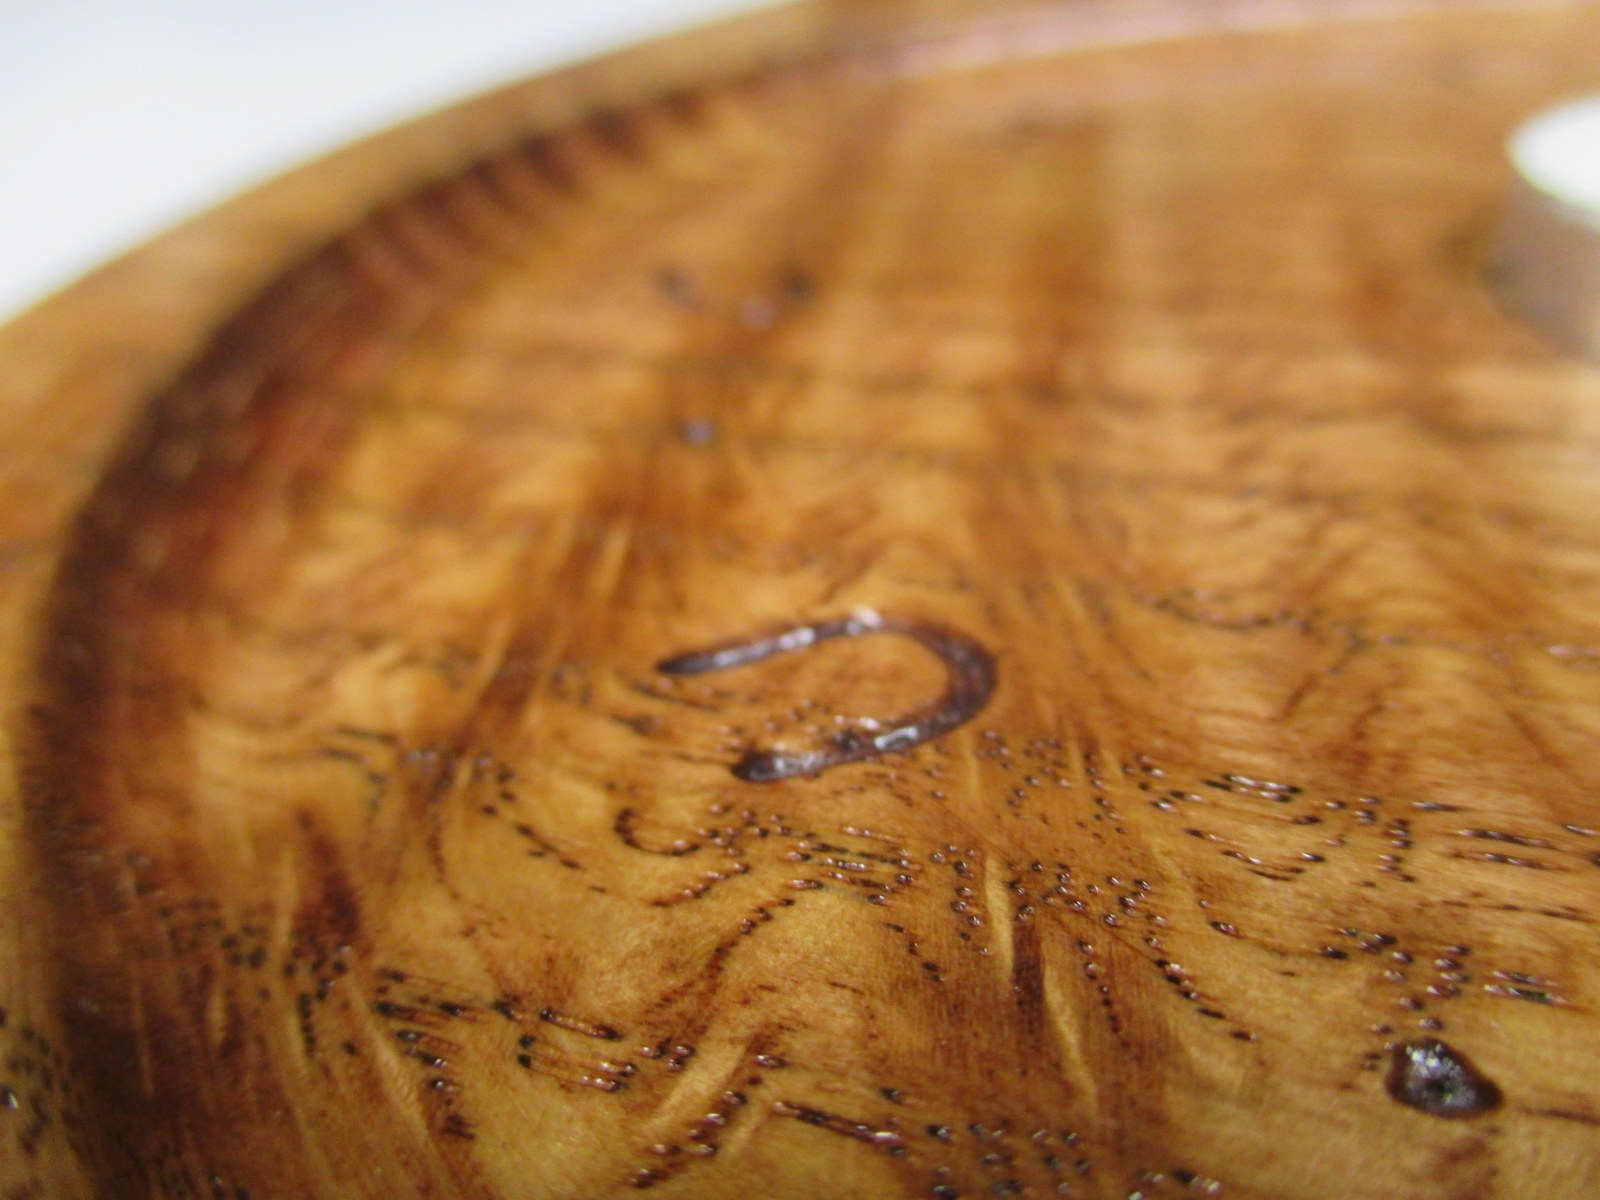
It’s solid end-grain, glued up with Titebond Ultimate, and sanded down to 2000 grit. It simply has mineral oil – the gloss is from the wood itself.
What do you think?
Here is the finished product.

Notice how glossy the top is? That’s what happens when you take Brazilian Cherry end grain to 2000 sanding.

The swirls in the grain pattern were intentional. As the pieces were glued up, the grain was alternated creating a very neat final pattern.

Here is a closeup of the grain.

This is prior to any mineral oil being applied. Notice the reflection of the light that is 9′ above the surface.

I-Beam clamps. They are great.

Making a Candle Holder with the CAMaster Cobra CNC Router
I have been rather impressed with the accuracy of our CAMAster Cobra 508 ATC CNC Router. Here is a picture of a similar machine:

For having a travel of over 5′ x 8′, it still handles the fine details with quite a bit of repeatable accuracy. I helped to make a candle holder out of a piece of curly oak. It turned out to be very pretty.
In the following picture, you can see 4 toolpaths. The large circular pocket (0.25″ deep), the small inner pocket, the radius around the edge of the circle, and the engraving.

The rest of the project was completed using a bandsaw and conventional tools. CNC brings a lot to the table (pun intended), but it is more amazing what a craftsman can do by hand.
Did you know that Okuma, who is a manufacturer of state of the art CNC machines, hand scrapes all the seven components of a machine foundation?
From http://www.okuma.com/handscraping:
Unfortunately, there is still no technology available to achieve the geometric precision that hand scraping does. Components need to be aligned within a millionth of an inch. And it’s where that kind of precision is needed that makes it even more critical: your machine’s foundation. The seven components of a machine’s foundation simply must be hand scraped to create ideal flatness, to develop proper oil pockets, and to achieve those tight tolerances.
In the world of CNC routers, we talk in “thousandths of an inch”. But in the above, they are talking in “millionths of an inch” and “by hand” in the same paragraph. That is simply amazing to me.
Here are some pictures of the finished product. The sum of some of the efforts of man, machine, and nature.


Making a Go board
I like the game Go. Wikipedia says it was invented about 2,500 years ago in ancient China. You can read more about it here:
http://en.wikipedia.org/wiki/Go_%28game%29
I was eating M&Ms yesterday and realized they would make great Go pieces. The added benefit is that if you capture your enemy… yum… We got some big bags of the colorful candy and sorted them. Note this is being done on our dining room “chess” table.

The plans were drawn up using DraftSight CAD (from the makers of SolidWorks). It looked like this:

I imported that into VCarve Pro and generated toolpaths. Here is what some of the gcode looks like:

I started by screwing down a leftover piece of pre-finished oak plywood and double-checking some tool measurements. Here is a picture of the grid being cut with a 90 degree v bit.

Subsequent operations included using a 0.50″ ball nosed bit for the edges of the pockets, a 1/2″ straight bit for the center of the pockets, a v bit for the outside chamfer, and a 0.25″ carbide upcut bit for cutting the board out.
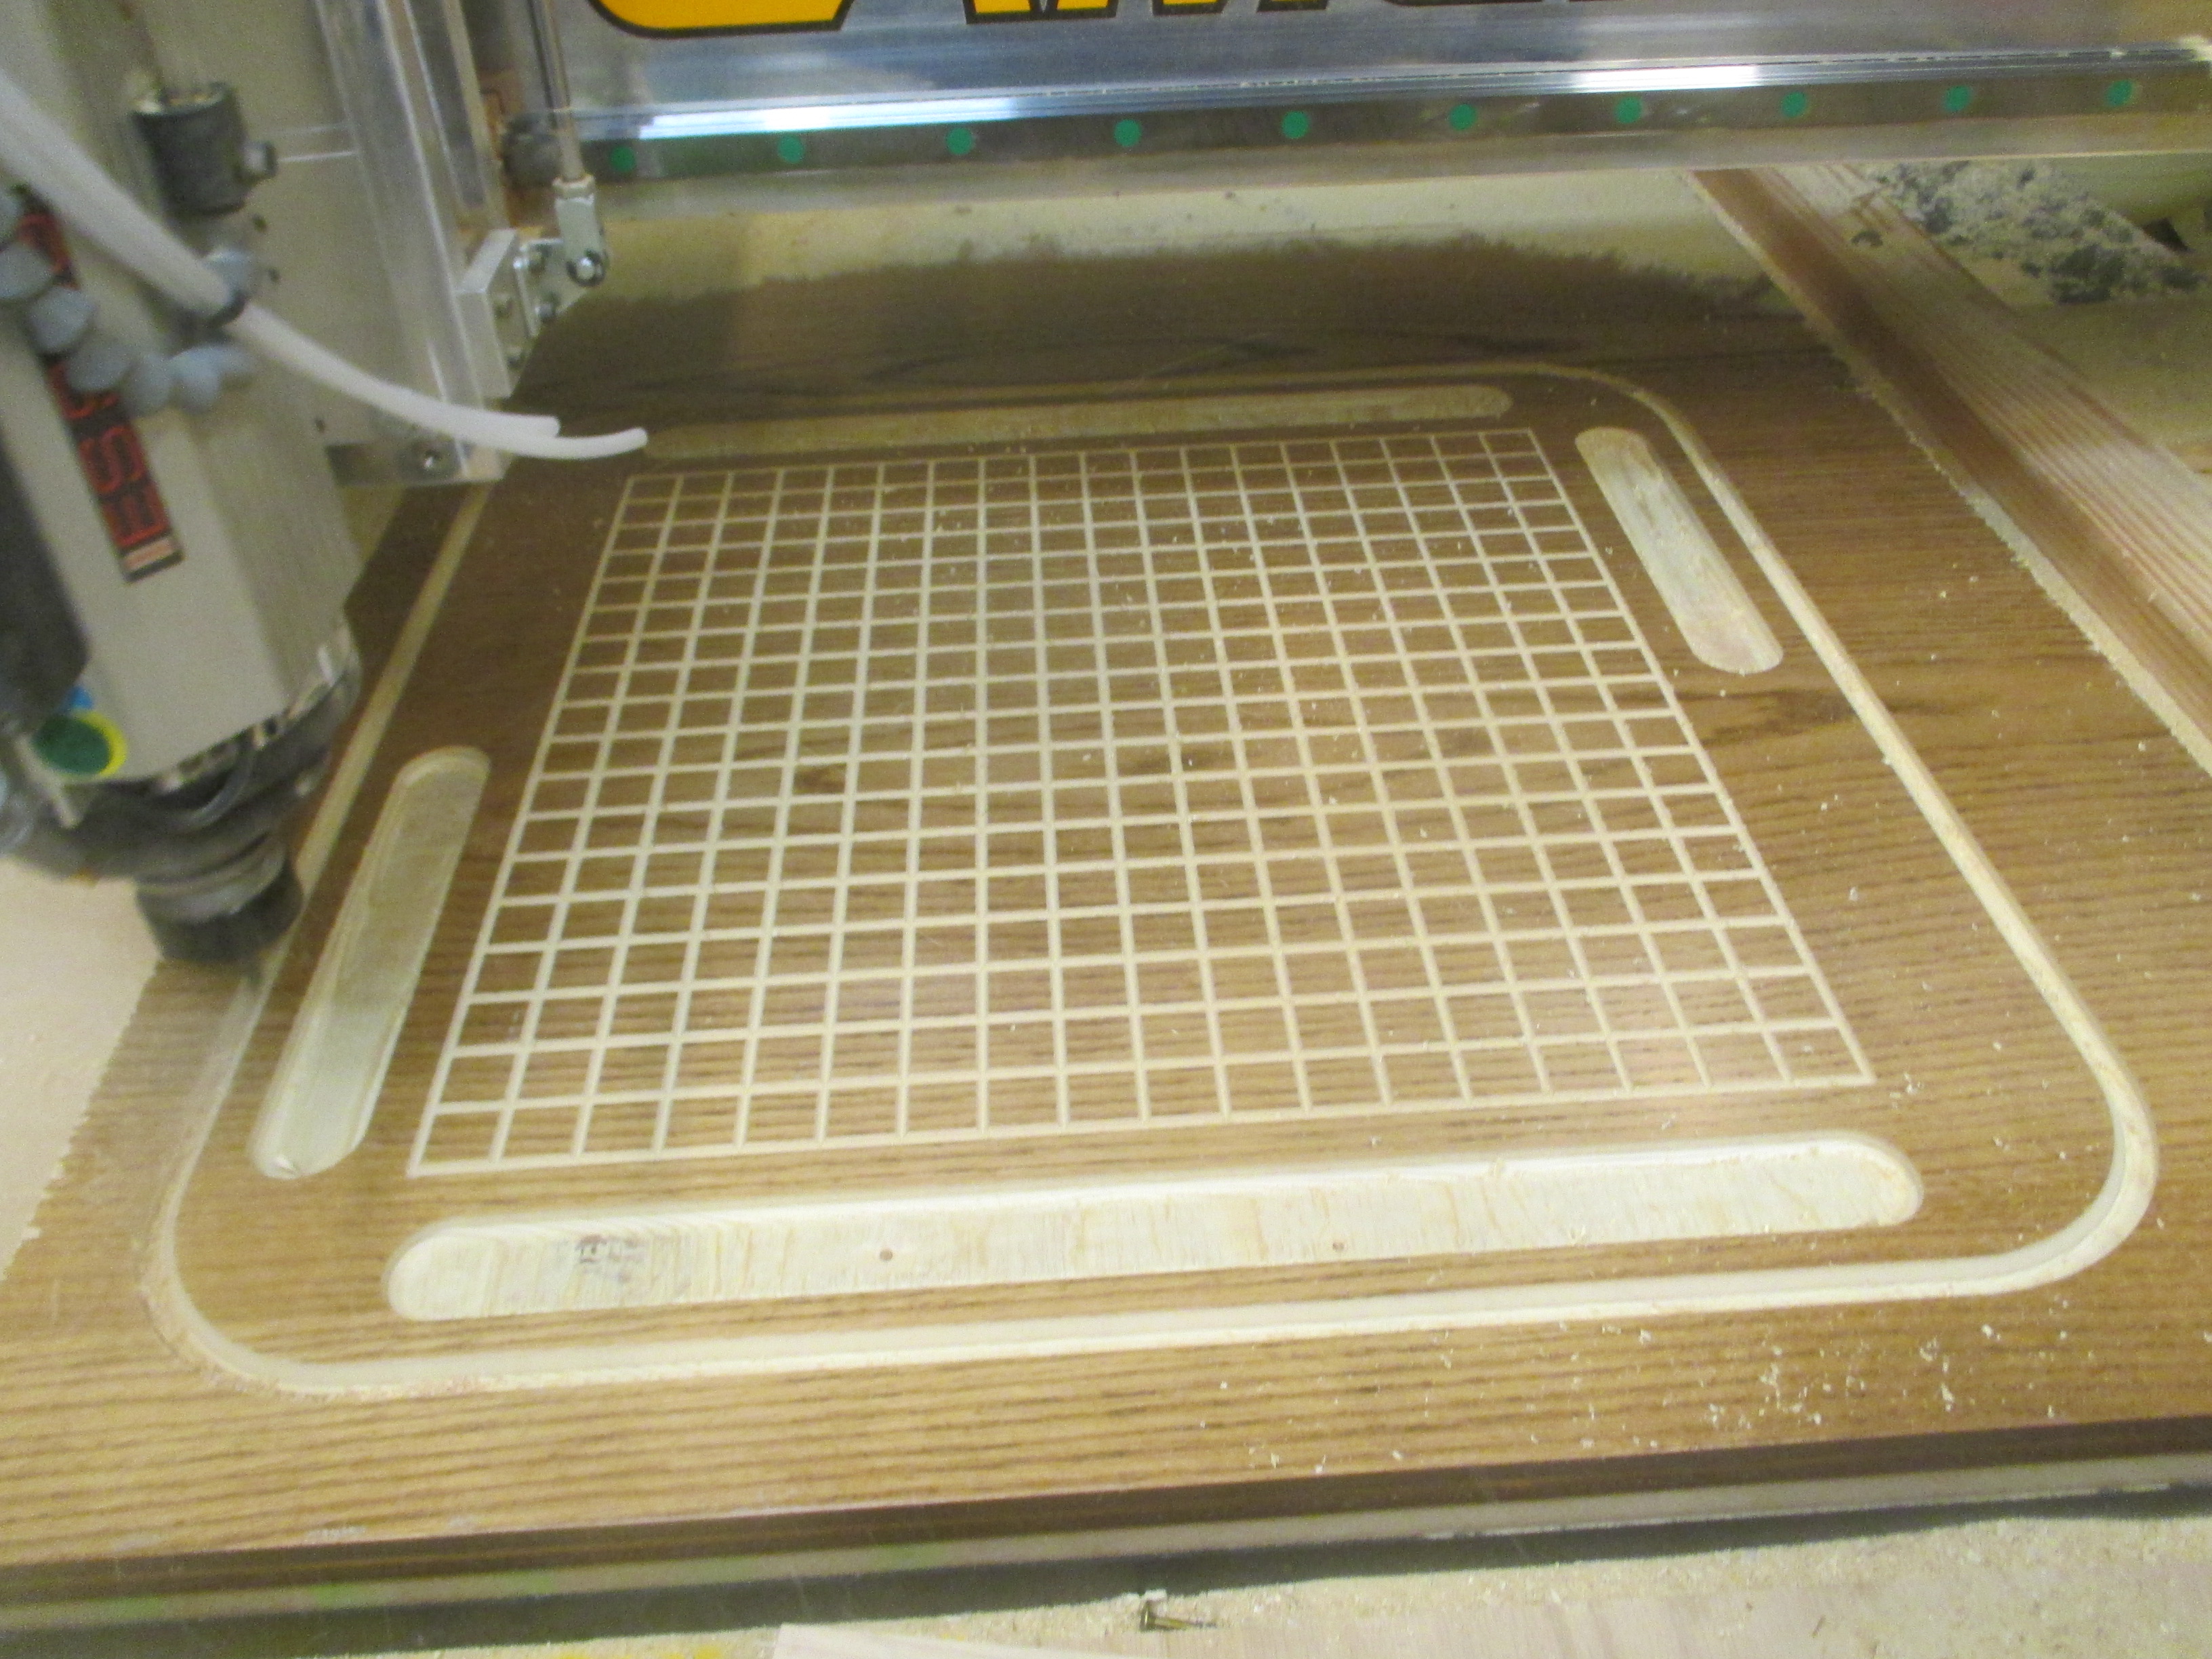
Since I lack a vacuum table, I used both onion skinning (a very thin final layer) and tabs (leftover connections you remove with a chisel) to keep the board from moving during cut out.

Here is a closeup of the grid. I need to understand a bit more about feeds and speeds with v-bits because of the very small diameter at the tip of the bit.

Here is a close up of the orange side during game play.

And finally a view of all-out-go-combat from above. I think orange is winning, don’t you?

Spider At Night
A spider was hanging out by my office door at night. Using the macro setting on my camera along with my Surefire flashlight, I got a close up picture that was pretty neat.

Sunset from Home Depot in Altoona
Looking west at the sunset over Altoona from the Logan Town Center Home Depot parking lot. Taken with Samsung Galaxy S2

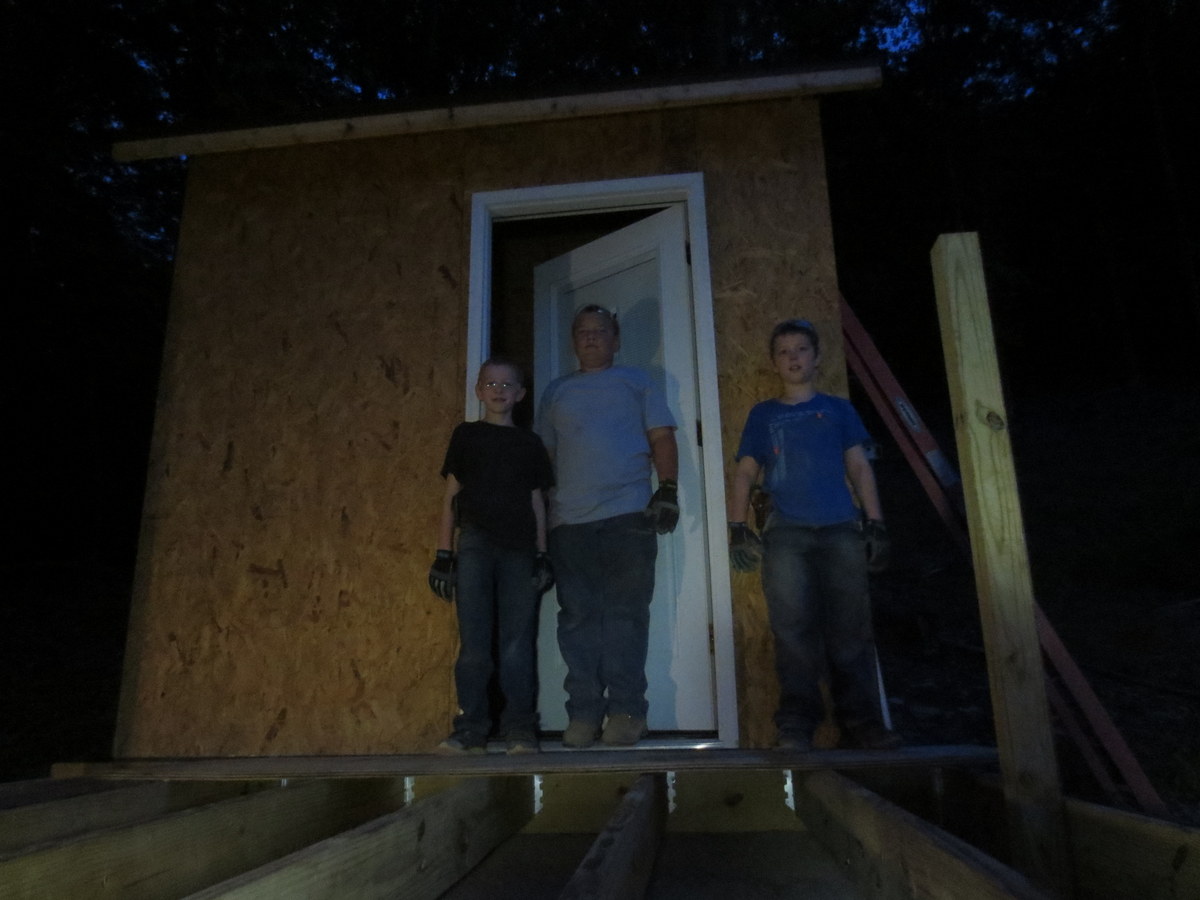
Building a little deck for a little house
In this post I will describe some of the work we did while building a 10′ x 10′ deck for the little house on the hill.
Because the house is on a rather steep hill, even getting to the front door was a challenge. Having a nice deck to sit on goes a long way to making it a wonderful little spot to spend time.
It all started with digging post holes. Rocky soil, on a hill, with hand tools makes for a lot of work. Once dug down to 2-3′, we fixed them in place with Fast Set cement. Poured it in dry and dumped some water on it. Super convenient.

Once the posts were in place, we leveled and screwed on a frame made of 2×10 and 2×8 treated lumber.

Keeping the workplace neat.

Working into the evening on the framing. Having 3 surefire flashlights handy makes this possible, even convenient.
Because much of the deck load will rest on the front member, and even more so because groups of people tend to converge at a railing, we made this from doubled 2×10 lumber.

Here we are installing the decking. Rather than going with standard decking lumber (5/4″), we opted to go with 2×8 lumber. It was only a few percent more expensive, and far stiffer.

Good workers hard at work.

We used a hand-saw to cut notches out of the end of the 2×8 flooring lumber where it (would have) contacted the 4×4 upright posts. We live in a culture that thinks “power tools” for most things, but sometimes the hand-tools are the best for the job.

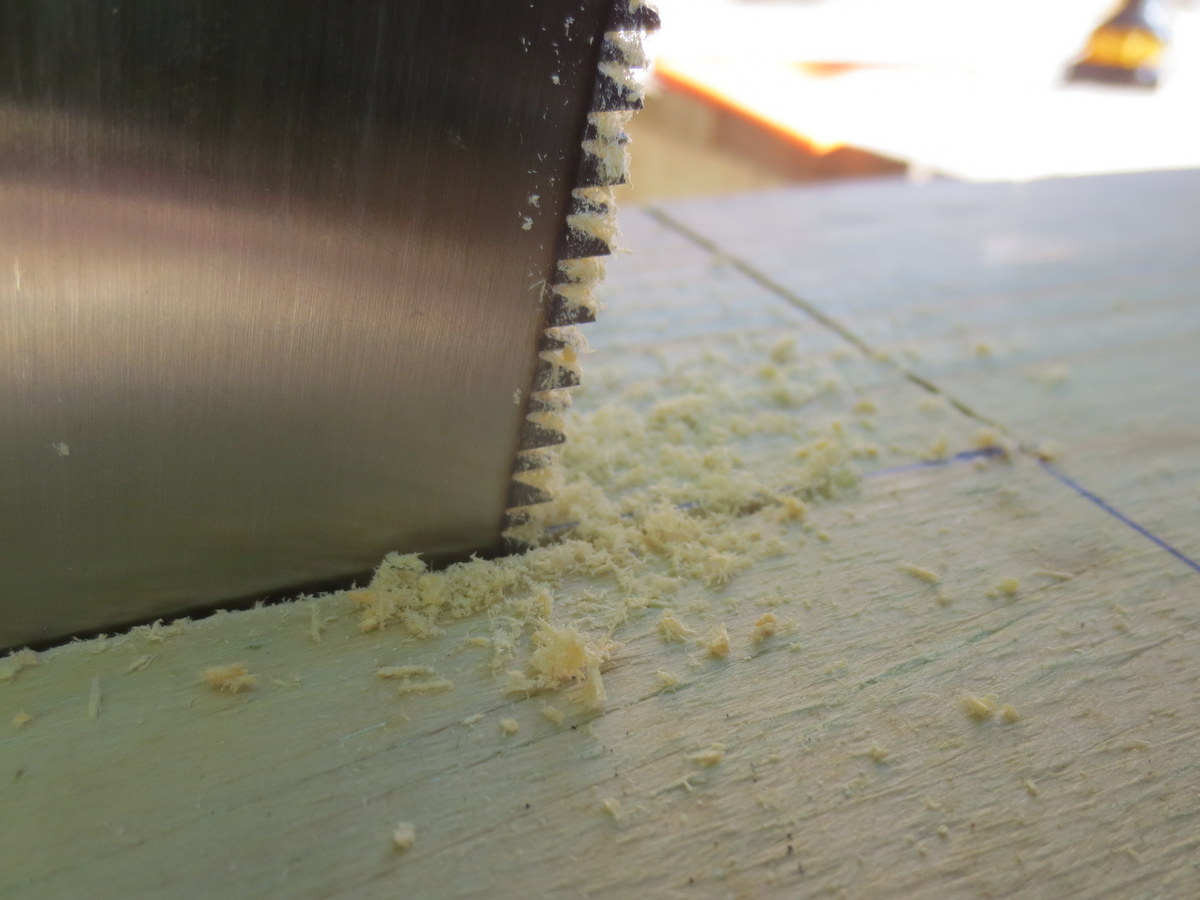
A close up of the hand-saw approaching the end of the line.
Notice that Eli (center) has hearing and eye protection? This is because he was running the impact driver installing all of the screws in the decking. There were hundreds and hundreds of screws to install.

Here is a view up the hill.

A very clear but warm day.

We made the railing with 2×6 lumber. The top part of the railing had a 2×6 on the face of the upright supports as well as a 2×6 cap on top. This resulted in a very strong (up/down and forward/back) railing that is convenient for setting drinks, etc… on.

For this project we elected to use Torx head exterior screws. Coupled with a Dewalt 20v max impact driver, the 3″ screws made their way through treated lumber like a hot knife through soft butter.

Wrapping up. Just need to finish screwing the decking down and add the top-plate to the railing.

The view out the front door. Nice.

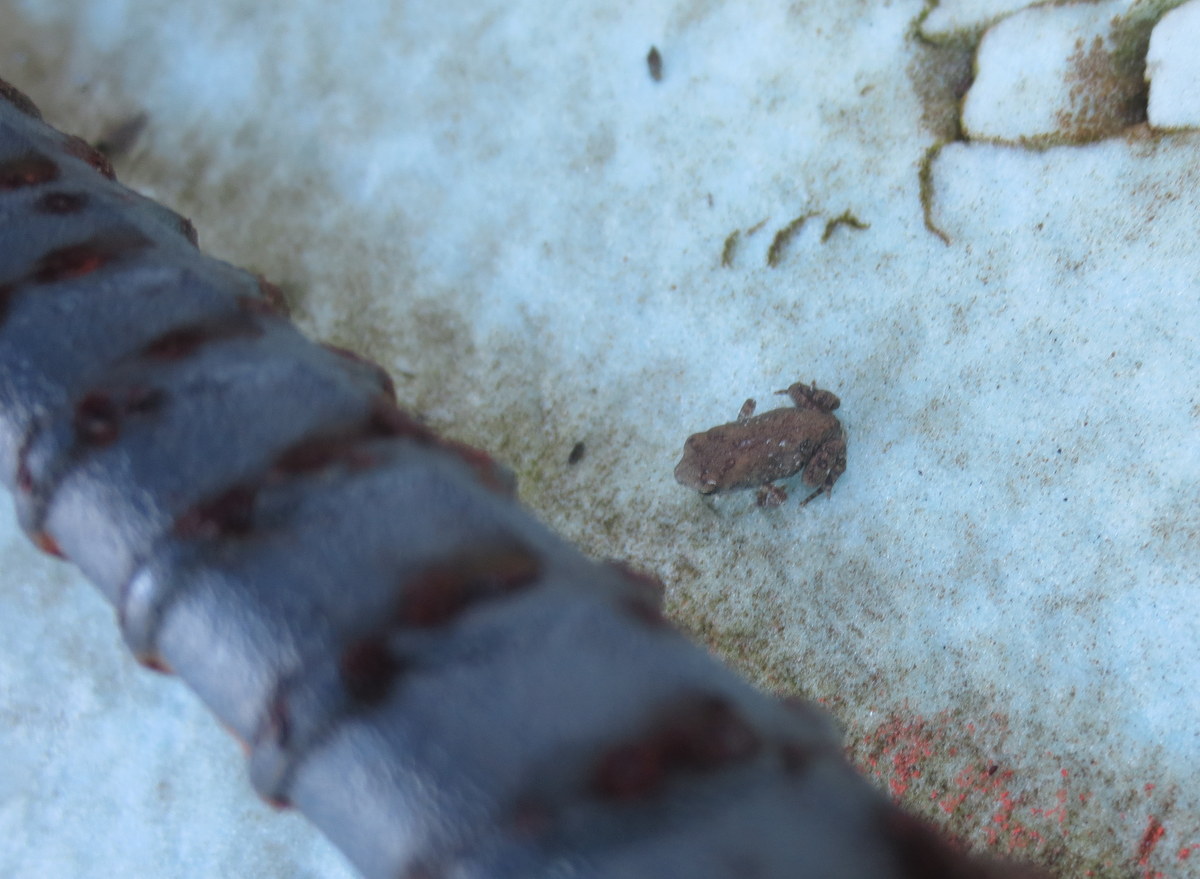
Spiders and bees and really small toads?
This photograph is of what appears to be a very small toad. The item beside it is a 1/2″ diameter section of rebar, making this little critter about 1/16″ long. I barely saw him.
This bee appeared to be out it the cold a bit too long and was pretty sluggish. This is taken on the back of by glove.

Here is a daddy long leg in the garden, running as fast as he could.

Slow Motion Gasoline Fire
240 FPS of a rag soaked in gasoline.
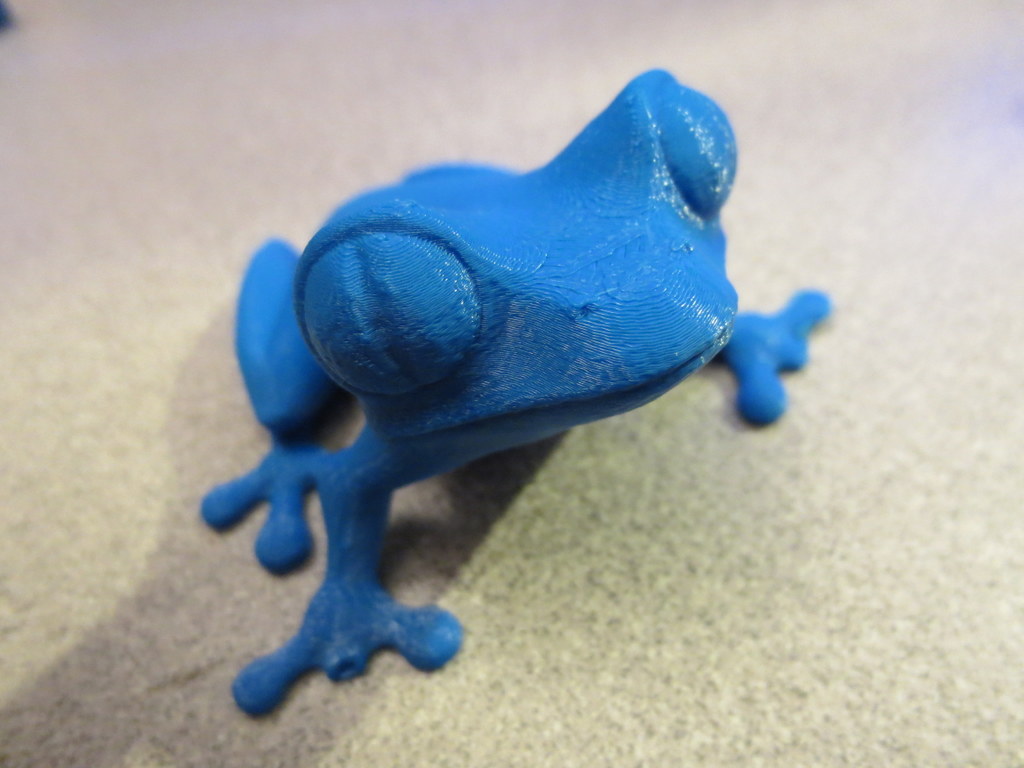
MakerBot Replicator 2 – Random Parts
Here are pictures of a few parts we printed on the MakerBot Replicator 2.